No need to replace your trimmer if the problem is only the head. We will guide you on how to remove Ryobi trimmer head and review the best replacement!
Ryobi is one of the trusted brands by many homeowners, and that is not just an accident. The Ryobi string trimmer, for instance, has been listed as one of the few best-value trimmers in the country.
If you want to understand more about Ryobi trimmer heads, then you need to know their different attachments, as well as how to remove Ryobi trimmer head.
In this blog, we will specifically go over the steps when removing a trimmer head safely. The main concern here is safety, so we will focus on that below:
How To Remove Ryobi Trimmer Heads?
Step 1
A: Turn it Upside Down
Get your trimmer and turn it upside down to know how you normally use it. Therefore, the trimmer head is now at the top and the handle is below. In other words, flip the trimmer inversely. However, we recommend this for the pros only.
B: lay it Down
If you want to be on a safer side, then laying it down on a flat surface after you unplugged it, of course. This is much more comfortable instead.
Step 2: Loosen The “Bump”
This is when the steps start to get a bit tricky. If you are a newbie, you might have a hard time identifying the parts of the trimmer.
But don’t worry. We will guide through.
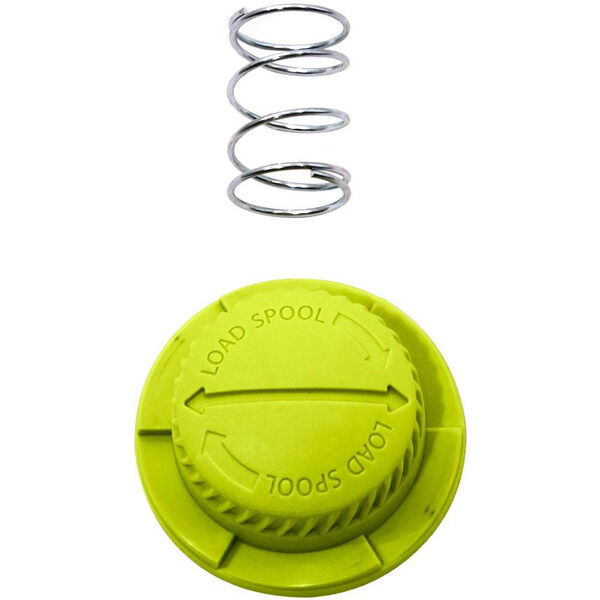
You need to locate the bump head and loosen it. The way to do this is by unscrewing the bump head counterclockwise. In some cases, loosening can be pretty hard, so you need the help of a plier to add more leverage.
Once removed, set it aside.
The bump head is also known as bump knob and it looks like the picture below:
Step 3: Say Goodbye To Inner String Reel
Just as the name entails, this part basically is a string inside the cutting head. Make sure you remove this part gently as you do not want it to accidentally spring onto you.
Set it aside as well and make sure not to misplace it.
Step 4: Remove The Trimmer Head
You must be cautious in this stage. If you are handling a gas Ryobi trimmer, then rotating the head a couple more times is needed. Do this until the notch of the flange washer lines up the with its slot.
Get your straight metal rod (must be thin) and insert it into the slot. This is to prevent the shaft and block its movement.
Note: You can use the blocking tool from the Ryobi trimmer supplies if you have one.
Now, you can see that the lower section of the machine is exposed fully.
Step 5: Grip It Firmly
Using your left hand, grasp the shaft housing firmly. Then bring up your right hand and wiggle the cutting head upward. Do this in a gentle manner.
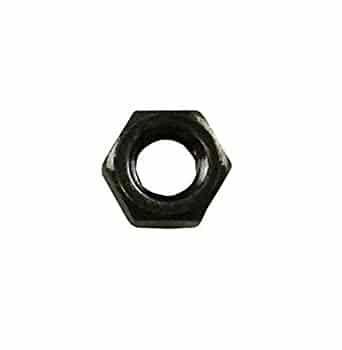
Just continue doing this until the head slips off the nut (specifically the hex nut which the head nestles on).
Check out how hex nut look like:
What’s The Best Ryobi Trimmer Head Replacement?
If you are still unsure on what trimmer head to use for your Ryobi tool, then we’ve got a great recommendation right here:
Ryobi String Trimmer Head Replacement
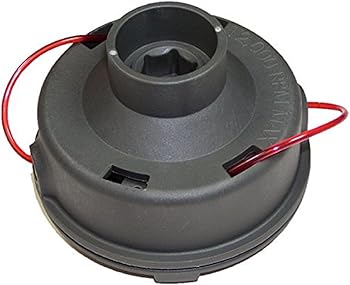
This universal replacement is compatible with most Ryobi string trimmers. It has an estimated dimension of 4 x 4 x 3 inches with an item weight of 7 ounces.
Tagged as universal, then you can be sure that this fits all Ryobi weed trimmers. This is a feature that we think is very practical. You don’t really know when you’d need to buy a new trimmer and when you do, at least you can still use the same trimmer head replacement.
Best Features:
- The all-in-one trimmer head replacement for Ryobi trimmers
- Comes with the necessary attachments except the bump head and bolt
- Easy to attach
- Durable and materials used are not bulky and heavy
- Suits well with other string trimmer bump head
- Equipped with wire inside the line for added strength
Recommended Reading:
- How to Level a Husqvarna Lawn Mower Deck (Quick Guide)
- How to Get Rid of Tall Fescue Step-By-Step Guide (11 Steps!)
- How to Store Bean Sprout Effectively (Expert Home Growers’ Tips)
